When you visit Walt Disney World, you need My Disney Experience. You’ll be lost without it.
That’s by design, as Disney has compressed 70+ years of theme park behavior into a single app.
So, what is this app, and how does it help you? Here’s a guide on My Disney Experience, your best friend on a Disney World vacation.
What’s My Disney Experience?
At its core, My Disney Experience is a planning and management program that will streamline your park visit.
You’ll use this app long before you arrive at the park and then rely heavily on it during your Disney visit.
Before we get into the specifics, we must tell you how to download the app, which is easy. You simply search for it on iTunes or the Google Play app.
Please verify that you’re downloading the correct product, as some sleazy entrepreneurs name their products similarly to entice clicks.
If a business is doing that, you definitely don’t want them to have access to the information on your phone. Be careful!
Once you have My Disney Experience added to your phone/tablet, tap it and then take a moment to examine the app.
We’re going to speak in general terms here, as Disney could redesign the layout at any point.
Still, the basic infrastructure will enable you to take complete control of your Disney vacation. We merely need to go over a few highlights about what the app can do.
Lightning Lane
You’ll use My Disney Experience to purchase Lightning Lane. Then, once you’ve acquired the service for the day, you’ll again use the app during your park visit.
So, your skill with the app will go a long way in determining how much you accomplish during your Disney park visit. Don’t worry! It’s not that hard!
Since Disney is running a business, the app will encourage you to buy all forms of Lightning Lane.
In fact, on the most recent version of the app, the home page starts with two giant calls to action, Disney’s way of enticing you to purchase a Lightning Lane (or two or three).
Should you want to buy Lightning Lane, you simply click the shiny Purchase button, which, if you’re anything like us, you really want to do anyway.
Then, you’ll select the date of your visit, followed by the park where you want a Lightning Lane. Seriously, it’s extremely basic stuff, and Disney has made the app user-friendly.
Hotel Information
The home screen on My Disney Experience will also show you the needed information about your upcoming vacation, presuming you’ve already booked one.
You’ll notice your hotel reservation information, and can tap this window to learn detailed information about the resort.
That’s something My Disney Experience does exceptionally well. It contains a library of information about all phases of a Disney vacation.
For example, on your hotel screen, you’ll learn your Disney Countdown, aka the number of days until the start of your trip!
You’ll utilize this section of the app frequently during your visit. That’s because it’ll display information about your hotel room. You can also unlock your hotel room door from the app!
This page lists hotel check-in and check-out times, and it’ll update with your hotel room number as soon as Disney assigns one.
We’ve often learned our room assignment via My Disney Experience. It’s such a great feeling to know that our room is ready, allowing us to begin our vacation in earnest!
You should notice another menu option on this page. It’s the “Get Directions” option (currently) beside Unlock Door.
Disney will tell you how to reach your hotel room from anywhere in the area! That’s something My Disney Experience does brilliantly. It’s the best Disney World map!
You’ll also find hotel menu options for information about hotel restaurants, recreation, shopping, and entertainment.
So, it’s a one-stop shop to know what you can do during your visit. Disney even includes a Guest Services screen should you have issues or need additional information.
Once you arrive at the resort, the app will update further, offering information about bus station arrivals and departures.
So, you can use My Disney Experience to learn when the bus you need will arrive, saving you the aggravation of waiting at the bus depot.
Our one word of caution with this strategy is that the line for buses often fills up early in the morning.
You should still wait at the bus depot in such scenarios, even when you know a bus won’t arrive for a while.
Park Information
On the app’s main page, you’ll find all four theme parks’ hours of operation for that date. You can also tap through to check the calendar for other dates.
This next page includes information about Early Theme Park Entry, Extended Evening Hours, Park Hopper availability, and much more.
For example, you can learn when Disney’s BoardWalk, the water parks, and the ESPN Wide World of Sports Complex will be open.
This page also lists all the Disney World attractions currently closed for refurbishment. You should definitely pay attention to this list, as it’ll save you some heartache.
My Disney Experience also includes a Today tab, and it lists details about the parks’ nighttime presentations and after-hours parties and events that evening.
At the bottom of My Disney Experience, you’ll notice a location pin. It’s a tab, too. In fact, it’s the most important tab of all.
When you click it, the app displays a list of all theme park attractions at Disney World.
You can narrow this list using the filters, which we tend to do by selecting one particular park for the day. You can also switch it to a map if that helps you with your planning.
To a larger point, you’ll use this tab A LOT during your visit. It’s where you’ll learn which attractions offer reasonable waits.
Please understand that Disney generally inflates its wait time estimates on the app.
Generally speaking, there’s a 15-20 percent cushion between the listed wait time versus how long you’ll actually stand in line.
Also, please know that since we said that, we’ve absolutely cursed you. Now, each of your estimated waits will prove 20 percent longer. Sorry!
We’re kidding. You should be fine. It’s a standard Disney practice to discourage guests from getting in lines when they’re already long.
If anything, you should be wary of a popular ride with a suspiciously low wait time. These are the kinds of tricks you’ll learn when using the app.
Similarly, you can book your Lightning Lanes on My Disney Experience. It’s in the Lightning Lane menu.
Once you’ve purchased Lightning Lane Multi Pass for the day, Disney will suggest attractions.
We’d be cautious about those, as Disney’s current algorithm is, well, dumb. It’s either that or malevolent, and we’re giving the benefit of the doubt.
The point is that its Lightning Lane suggestions won’t maximize your visit. Since you know the rides you’re most interested in experiencing, you should prioritize those.
Once you’ve scheduled your three reservations before your trip, you’ll use the My Disney Experience during your park visit.
When you use your first Lightning Lane by tapping your MagicBand or other park admission option in the line queue – some lines require two check-in taps! – you can start searching for your next Lightning Lane.
You should do this throughout your visit since you’ve paid for the service. And Disney makes the process of booking new Lightning Lanes simple.
Just triage your choices by prioritizing the attractions that you know are either highly in-demand – we’ve discussed that in a different section – and which ones you want to do.
Target them and book it on My Disney Experience. The process shouldn’t take 15 seconds. It’s that painless.
Additional Park Information
Thus far, we’ve only focused on a couple of tabs. There are many more under the location section of My Disney Experience!
You’ll discover menu options for Dining, Attractions, Entertainment, Characters, Restrooms, Shops, Shows, Transportation, Guest Services, Events and Tours, PhotoPass, and Resort Hotels.
We’ll discuss PhotoPass in a bit, and some of these other options are self-explanatory. Still, we’ll point out a few things.
First, in certain circumstances, that Restroom tab can be your salvation. Disney will show a map with directions to the facilities closest to you. At times, you will be VERY grateful for this.
On the Entertainment, Shows, and Characters front, these tabs assist you in getting the most out of your trip.
They’ll tell you where to find your favorite Disney characters, as well as which live performances are occurring at the park you’re visiting that day.
Events and Tours will probably prove a bit too niche during your first Disney vacation, but they’re options to explore for future trips.
So, when you experience love at first sight with a Disney park/resort, you can start examining Events and Tours for next time.
Transportation lists the operating hours for the various buses, boats, gondolas, and monorails near your park.
You should glance at this tab on days when you know you’ll be arriving early or leaving late. Thankfully, the transportation hours remain relatively static throughout the year.
Finally, you probably won’t need the app to find Disney World stores, as you can’t throw a stone without hitting one.
Still, what we like about this tab is that when we’re searching for a specific kind of memento, we can learn which park stores are in the area that may sell it. There’s value in that.
Merchandise Mobile
And that topic leads us straight to the Merchandise Mobile tab, which you’ll (currently) find when you hit the + button at the bottom of every My Disney Experience page.
Did you know that you don’t need to stand in line to check out at every Disney store? Unbelievably, it’s true.
Disney has created a new technology called Merchandise Mobile. You put all your items in a clear plastic bag. Then, you add each item to the app.
When you’ve finished shopping, you check out via My Disney Experience. It can save you soooo much time, especially at Disney’s biggest stores.
As a relatively new technology, Merchandise Mobile isn’t widely available yet, but you should use it whenever possible.
Mobile Ordering
We’ve dedicated a full section to Mobile Ordering. So, we’re not going to get into it much here. Still, you should know that you need to use the app version of My Disney Experience.
That’s how you book all your meals, and the app allows you to control the entire process. You can customize every order, but that’s not even the best part.
Disney has built Mobile Ordering in a unique way for a restaurant. You, as the diner, can signal the restaurant when you’re ready for the staff to prepare your meal.
Don’t you wish you could do that at every other restaurant? You’d always have piping hot fresh food served to your precise specifications.
Frankly, Disney ruins dining for everyone else. Nobody else can match this sort of efficiency and precision when it comes to food service. We’re in awe of Mobile Ordering.
On the app, all you need to do to use it is hit the + symbol. It’s the second option (currently) under Check Dining Availability, which we’ll also cover in the Mobile Ordering section.
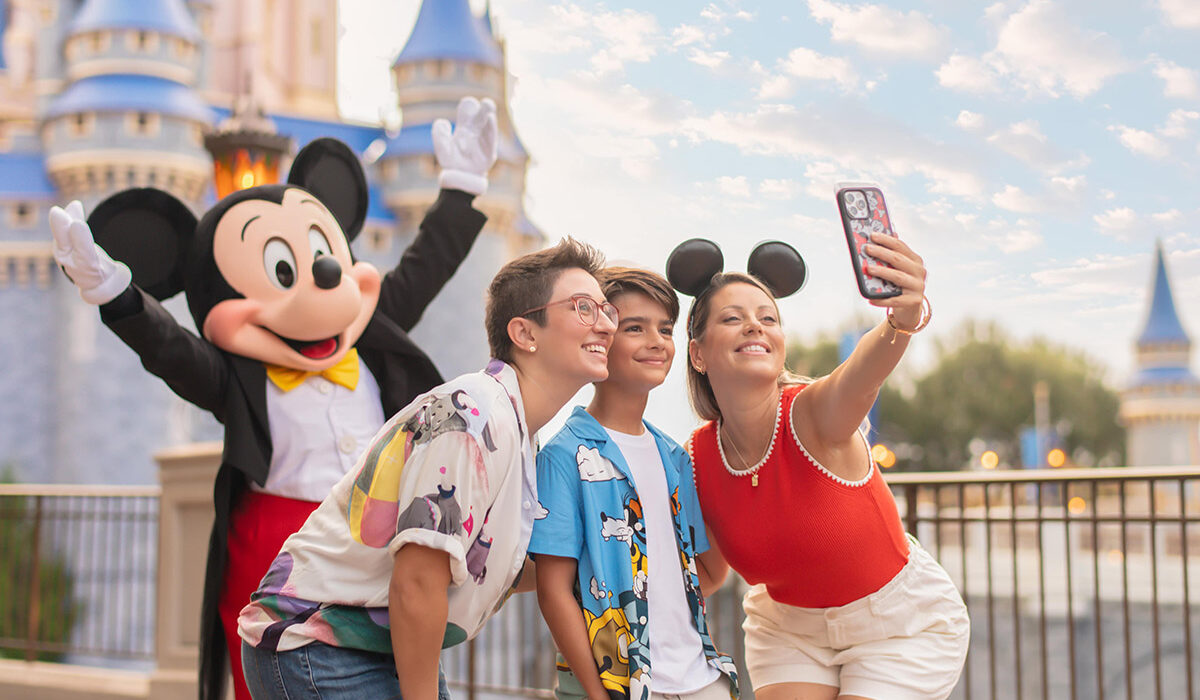
PhotoPass
Whenever David pulls up PhotoPass on My Disney Experience, an image haunts him. It’s Kim wiping the floor with him at Buzz Lightyear’s Space Ranger Spin.
That picture appears on the app’s home page every time he loads it! And he knows he lost.
While this may sound humiliating – you lost, David! – the truth is that it exemplifies the genius of My Disney Experience.
The app has fully integrated PhotoPass organically on the front page. So, whenever you want to see your Memory Maker pictures, it’s a painless process.
You click the “My Photos” button and voila! Suddenly, you’re looking at your Disney vacation photo library!
Ride videos are included with this package as well. This section of the app includes every captured visual from your vacation.
For this reason, you’ll smile every time you load this page, even if your partner absolutely wrecks you at Space Ranger Spin.
If you’ve linked your family and friends, their pictures will display here as well, allowing you to live vicariously through them when they’re at Disney but you’re not.
David’s older brother recently retired, and they travel to Disney World two or three times a year. So, we get to keep up with their Disney adventures when we’re stuck at home working.
To a larger point, you’d be shocked how much a quick ride video can cheer you up when you’re bored and just glancing at your phone.
That’s one way a Disney vacation resonates long after you’ve returned home. Your PhotoPass collection remains on your phone indefinitely.
There’s a caveat here, though. We’re Annual Passholders. For those of you who aren’t, Disney’s rules indicate that your photos will remain in your account for 45 days after your trip.
While it’s suboptimal that they don’t stay in your My Disney Experience account, you can just save them to your phone. So, it’s the same thing, just in a different location on your phone.
By the way, if we’ve made PhotoPass and Memory Maker sound great – they’re the same thing – you can buy it in the app! It’s (currently) two slots under Order Food on the app.
Disney PhotoPass Lenses
Disney PhotoPass Lenses are another unique My Disney Experience feature.
These are augmented reality videos and photos that you can take with your device.
Disney provides this feature as a bonus for Annual Passholders and anyone who purchases Lightning Lane Multi Pass for the day.
You gain access to the lens feature on your phone. In simplest terms, you’re taking a selfie, or what Ted Lasso would call an “us-ie,” with various Disney characters.
You’ll cycle through various options, such as Minnie Mouse on your shoulder, a flying Tinkerbell beside you, or Grogu hanging on your back. You can also use park-specific ones, with our favorite one being the Bellhop look from Twilight Zone Tower of Terror.
We get bored with lenses after only a few minutes, but they are a solid temporary distraction while standing in line.
Those of you who love playing with your camera or posting selfies may view this as a justification to purchase Lightning Lane Multi Pass.
In a different section of the book, we debate which parks are worth the price of Lightning Lane Multi Pass.
Your answer may be “all of them” if PhotoPass Lenses sounds like something you’d enjoy.
For us, they’re an instantly forgettable frivolity, but we’re Gen X.
We doubt you see the world the same way we do.
Buy Tickets and Passes
We mentioned earlier that when you visit Disney the first time, you may just know. You can instantly realize that you’ve found your home, at least as far as vacations go.
When that happens, you’ll instantly start planning future trips in your head. Well, you can codify those plans by going ahead and purchasing tickets or maybe even an Annual Pass!
Disney enables these purchases right there in the My Disney Experience app. We’re always going to recommend that you speak to a MickeyTravels agent instead, though.
Going directly through the app is the equivalent of using an airline app to book plane tickets. You’ll rarely get the best deal that way since you’ve given away negotiating power.
Park Passes and Disney Genie
We’re grudgingly giving Disney Genie its own section, although it most assuredly doesn’t deserve one.
Still, you should know that you can access Genie Day and Tip Board from the app. It’s (currently) on the bottom of the + menu’s vertical tabs.
And yes, we know that we’re saying (currently) a lot, but TikTok didn’t exist until 2016, Google 1998, and ChatGPT late 2022.
Technology moves fast, so we’re hedging our bets by telling you where things are now. Even if they move, you’ll know that they should still be there. You merely have to find them.
That brings us to Park Passes, which we’ve detailed in a different section. Long story short, you probably don’t need one now.
However, should you need a Park Pass, you book them on My Disney Experience. They’re on the + menu as well.
The Hamburger Menu
Disney thankfully consolidates everything on what we call the hamburger menu. On My Disney Experience, you’re looking on the bottom right for three rows of straight lines stacked on top of one another.
That’s what we call a hamburger on user interfaces, and it’ll be your go-to throughout your park visit.
That’s because it lists menu items such as My Tickets & Passes, Lightning Lane Passes, Order Food, Reserve Dining, Merchandise Checkout (Merchandise Mobile), and Notifications.
That’s just the top section! You’ll also find Wait Times & Showtimes, Today’s Plans, Future Plans, Hotel Reservations, Disney PhotoPass, transportation options, Account information, and Plan My Next Visit.
That last one enables the ability to purchase tickets and passes, make park reservations, and even check theme park operating hours.
Basically, you’ll find almost everything important we’ve discussed here under the hamburger menu. So, those three straight lines in the right corner will become your buddy.
Whenever you want to check wait times, order food, book a Lightning Lane, or check wait times, you should go here.
So, please get in the habit of checking this page rather than the individual ones we’ve listed. It’s a tighter, more efficient system.
We’ve told you where to find the other stuff in an emergency, but the hamburger menu will define your park visit, presuming you learn to use it correctly.
Overall, My Disney Experience works like anything else in life, especially tech. You may struggle with it at first. Soon afterward, you’ll feel like an expert, though.
Feature Image: Disney